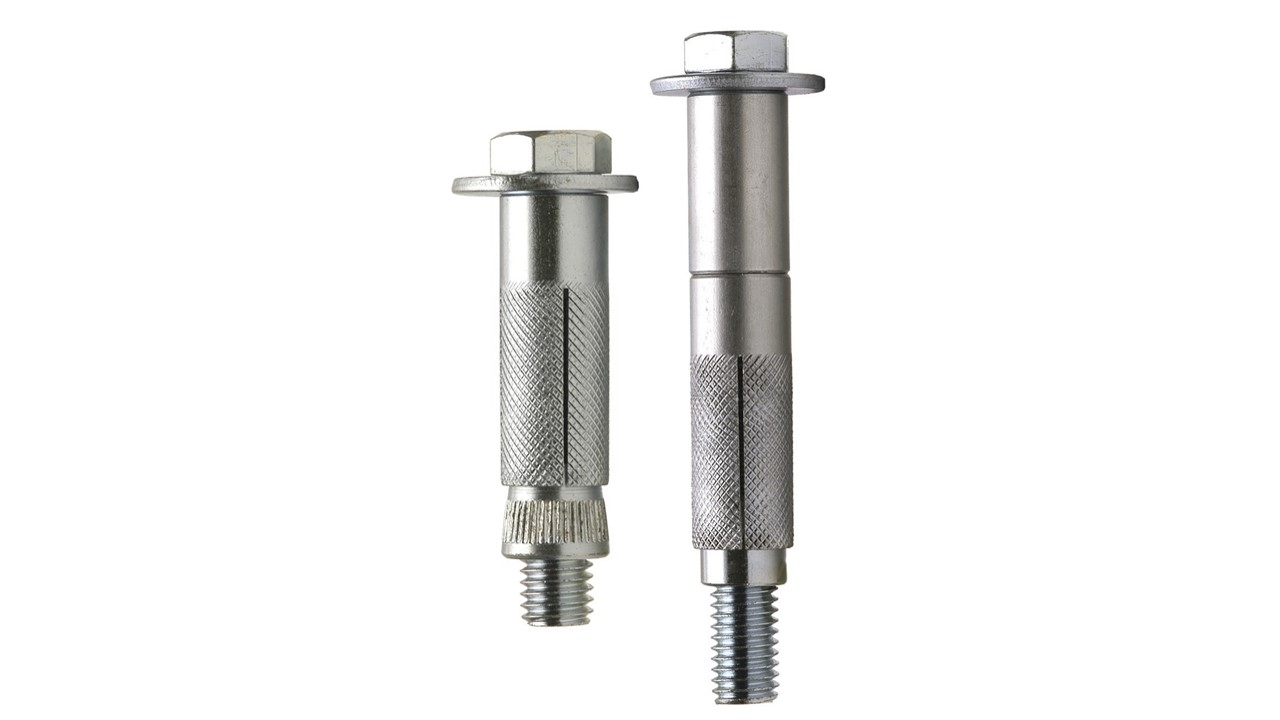
The CB and CBPL anchors (with extender) are mechanical torque expansion anchors, supplied with a screw, washer, jacket and cone, these are the best-known anchors on the market and Walsywa has a range of diameters ranging from 1/ 4″ to 1″.
Menu
WALSYWA » Produtos » Mechanic Fastening System » Anchor bolts (Mechanical Fixation) » CB/CBPL ANCHOR BOLT
| Description | Thread diameter | Hole diameter | Length Bolt | Jacket length | Length of the extender | Minimum hole depth | Max. thickness to be fixed | Tightening torque | Average loads* (kgf) | ||||
| Diameter A | Diameter B | c | d | e | f | g | N.m | Traction | Shear | ||||
| in. | in. | mm | in. | mm | mm | mm | in. | mm | mm | ||||
| CB 14200** | 1/4″ | 3/8″ | 10 | 2″ | 50 | 32 | – | 2″ | 50 | 8 | 12 | 1127 | 800 |
| CBPL 14300** | 3″ | 76 | 22 | 3″ | 76 | ||||||||
| CB 56214 | 5/16″ | 1/2″ | 13 | 2 1/4″ | 57 | 34 | – | 2 1/4″ | 57 | 7 | 25 | 1773 | 1190 |
| CBPL 56314 | 3 1/4″ | 82 | 25 | 3 1/4″ | 82 | 1902 | |||||||
| CB 38212 | 3/8″ | 9/16″ | 14 | 2 1/2″ | 63 | 37 | – | 2 1/2″ | 63 | 16 | 40 | 2143 | 1617 |
| CBPL 38312 | 3 1/2″ | 89 | 25 | 3 1/2″ | 89 | 14 | 2753 | ||||||
| CB 12300 | 1/2″ | 3/4″ | 19 | 3″ | 76 | 50 | – | 3″ | 76 | 18 | 100 | 2970 | 2897 |
| CBPL 12412 | 4 1/2″ | 114 | 33 | 4 1/2″ | 114 | 20 | 4929 | ||||||
| CB 58312 | 5/8″ | 7/8″ | 22 | 3 1/2″ | 89 | 60 | – | 3 1/2″ | 89 | 18 | 180 | 3333 | 4967 |
| CBPL 585500 | 5″ | 125 | 45 | 5″ | 127 | 14 | 5841 | ||||||
| CB 34412 | 3/4″ | 1″ | 26 | 4 1/2″ | 114 | 80 | – | 4 1/2″ | 114 | 19 | 350 | 4320 | 6573 |
| CBPL 34612 | 6 1/2″ | 165 | 63 | 6 1/2″ | 165 | 10 | 6657 | ||||||
| CB 10600 | 1″ | 1 1/4″ | 32 | 6″ | 152 | 100 | – | 6″ | 152 | 35 | 400 | 7790 | 12080 |
| CB 10900 | 9″ | 228 | 79 | 9″ | 228 | 30 | 11676 | ||||||
* Loads obtained in 30 MPa strength concrete. Tests performed at the Walsywa Laboratory.
** Available with Grade 2 screws or studs (Gr. 2) and grade 5 (Gr. 5). For Gr. 5, the average tensile load is 1395 kgf and shear is 1007 kgf. Tightening torque for Gr. 5 is 25 N.m. Consider safety factors according to the table in the general catalog.

Image01: 1 Drill the hole with indicated diameter and depth and clean afterwards;
Image02: 2 Insert the assembled anchor through the hole;
Image03: 3 Tighten the screw with the torque indicated in the table above;
Image04: 4 Loosen the screw, position the part to be fixed and give the final torque.
 Concrete
 Hollow Block
 Rock
Rock Drywall
 Cement Board
 Wall Panel
 Wood
Wood OSB
OSB Structural Steel
 Metal Tile
 Aluminum
 Guides and amounts